So, you're riding the train into the dangerous world of Dead Sails on Roblox? This guide is here to help you get started, covering the basics of your train journey, how to survive the dangers, find loot, and reach your final destination. Think of this as your friendly roadmap to not getting stranded (or eaten) out there in the land of Dead Sails.
How to get Started in Dead Sails
To survive and reach the end goal in Dead Sails, you'll need to master managing your train, looting resources, trading wisely at forts, and defending yourself against zombies and other nighttime horrors. This guide will walk you through the essentials, from fueling your ride to fighting off werewolves.
Understanding the Goal in Dead Sails
Okay, first things first, what are you actually trying to do in Dead Sails? Your main objective is to travel 100km down the railroad tracks and ultimately defeat the fearsome Kraken that waits at the end. It used to be just lowering a bridge at 80km, but things have gotten a bit more intense!
Your First Steps in Dead Sails
When you first jump in, the game gives you a quick tutorial on how to sell and buy things, and how to fuel up your train. Pay attention to this! It might seem simple, but knowing how to manage your fuel and trade items is super important, especially when you start finding goodies in buildings, and run out of fuel and start to panic as your being attacked by zombies or worse.
Controlling Your Character in Dead Sails
The controls are pretty standard for a Roblox game on PC:
W, A, S, D: Move your character around.
M1 (Left Mouse Button): Grab/Drag items, or use a weapon.
E: Interact with objects (like levers, doors, or picking up money bags).
Z: Weld an item you are currently dragging onto the train or cart. Press Z again while looking at a welded item to unweld it.
Riding the Rails and Finding Loot in Dead Sails
As you travel along the tracks, keep an eye out for buildings. These are super important, as they can give you resources, weapons, and fuel which are all important to your survival.
Looting Buildings: Be careful, though! Some buildings might have zombies lurking inside. Clear them out (or cleverly lure them away) before you start searching. You can find all sorts of items, which you can then weld onto your train to customize it or store things.
Forts: Your Safe Havens in Dead Sails
About every 10km, you'll come across a fort. These are basically your checkpoints.
Trading and Stocking Up: Inside forts, you can sell items you've looted and buy essential supplies. Coal is fantastic fuel, and ammo is always good to have. Don't be shy about spending your money here; you can't take it with you past the Kraken!
Making Money Fast: The Bank in Dead Sails
If you've spent all your cash and looking to resupply, look for a Bank building along the tracks. You'll likely have to deal with a zombie teller, but if you can find the code (usually nearby) and figure out the vault combination, banks are often stuffed with valuables and cash. But finding the code can be quite difficult, so if you can see night falling, head straight back to your train and move on.
Danger Zone: Infested Towns in Dead Sails
You'll also encounter Infested Towns. Be super careful with these, especially early on.
High Zombie Count: These towns are crawling with zombies. Don't even think about going in unless you're well-equipped and it's daytime.
Avoid at Night: Seriously, do not go into an Infested Town after dark. It's a recipe for disaster.
Surviving the Night Terrors in Dead Sails
Nighttime is when things get really dangerous in Dead Sails. It's generally best to keep your train moving. Three nasty types of enemies can spawn:
Fast Zombies: Quicker than the usual shamblers.
Vampires: Another nighttime nuisance.
Werewolves:These are the biggest threat. They hit hard and have a lot of health. Getting swarmed by werewolves at night is a very bad situation.
In short: Keep your train fueled, drive, loot buildings when safe, sell valuables and buy supplies at forts, and be extremely cautious at night.
About Your Train in Dead Sails
Your train is your lifeline, your home base, and your ride to the finish line. Keeping it running is priority number one.
Speed: The train's top speed is around 64-65 km/h. (Sometimes bugs can make it go way faster, but don't count on that!)
Jumping:Be careful jumping while the train is moving! You can easily fall off. Find a chair to sit in or just avoid jumping altogether. Welded items can also sometimes launch you unexpectedly.
Welding: Remember, you can only weld items onto the train itself and the wooden cart attached to it. You can't just stick things anywhere.
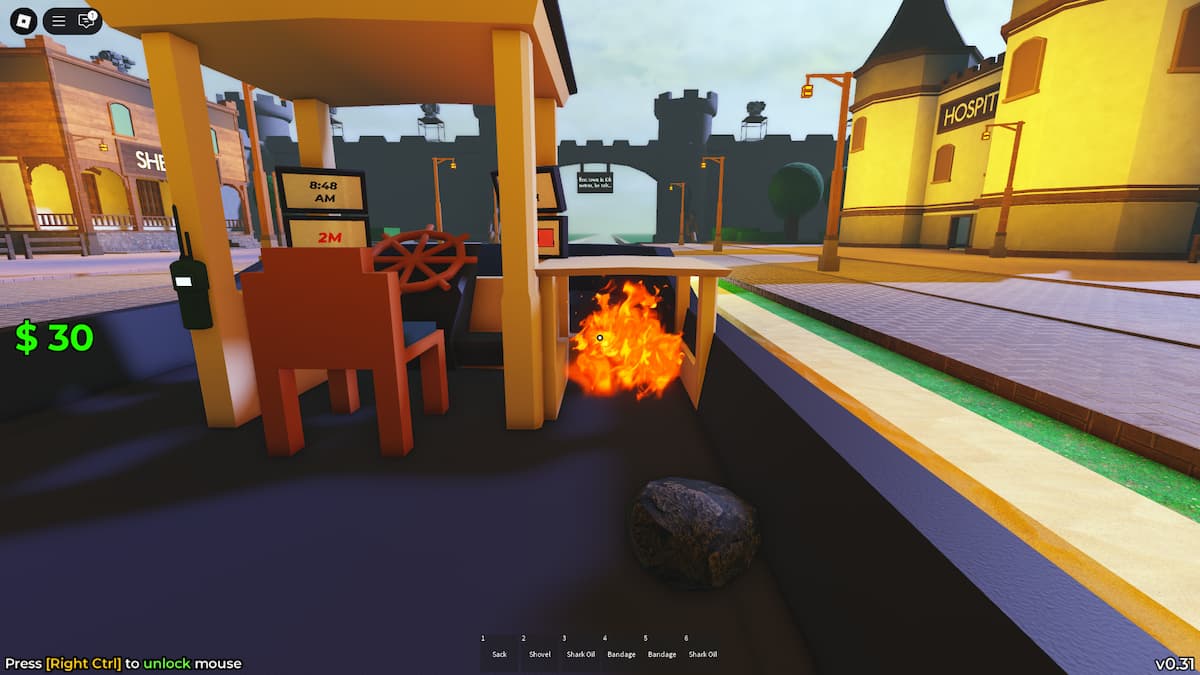
Fueling the Train Firebox in Dead Sails
The Firebox is where the magic happens. You need to constantly feed it fuel to keep the train moving.
Location: It's right next to the dials, a crucial part of the train's controls.
Importance: Running out of fuel strands you, possibly in a dangerous area. You can use zombie bodies as emergency fuel if you survive a night stranded, but it's not ideal.
Best Fuel:Coal is the most efficient fuel source you can find. Stock up whenever you can!
Click and Drag: To add fuel to the Firebox just click and drag items into it. It's very simple!
Reading the Train Dials in Dead Sails
Your train has four important dials that give you critical information:
Time: Shows the current in-game time. Night begins around 11 PM, and daytime starts around 6 AM. Keep an eye on this!
Fuel: Gives you an approximate idea of how much fuel is left in the firebox. Watch this closely!
Distance: Tracks how far you've traveled in meters (1000m = 1km). Your goal is 100km (100,000m).
Speed: Shows your current speed in km/h.
The Importance of the Wooden Cart in Dead Sails
That wooden cart attached to your train is super important. It's where you'll store loose items, place extra fuel, and mount weapons like turrets. You can find and attach more carts if needed, making it essential for carrying loot and defenses.
Using the Train Horn in Dead Sails
There's also a lever for the train horn. Pull it to make a classic train horn sound. It doesn't really do anything gameplay-wise, but it's fun!
How to Store Items in Dead Sails
As you're chugging along in Dead Sails, you'll definitely want to stop and check out those buildings you pass. They're full of useful stuff – resources for your train, items you can sell for cash, maybe even some fuel. But here's the thing: you can only put certain items, like weapons and healing items, onto your hotbar for quick access. For those items you only need to press E to equip them to your hotbar!
So, what do you do with all that other junk you find, like pipes, paintings, coal, or even valuable gold bars you want to sell later? Dragging every single thing back to the train one by one would take forever, right?
That's where the trusty Sack comes in! This thing is super useful for carrying a bunch of stuff at once.
Equip the Sack: Press the '1' key on your keyboard to equip the Sack.
Storage Capacity: The Sack can hold up to 10 items inside it.
What Can It Hold?: Pretty much anything that isn't equipped! This includes Fuel, valuable items for selling, random junk like pipes or paintings, and even the corpses of enemies you want to turn in for cash or burn in the Firebox/
How to Store Items: While the Sack is equipped (in your hands), look at the item you want to pick up so your aiming dot is over it. Then, press the 'F' key. Poof! The item goes right into your Sack.
How to Take Items Out: Need something from your Sack? Just press the 'F' key again while the Sack is equipped. The items will pop back out onto the ground near you, ready to be used or sold.
Using the Sack makes looting way more efficient and saves you a ton of time running back and forth to the train with individual items. Don't forget about it!
All Structures in Dead Sails
You'll find various buildings along your journey. Knowing what's inside can help you decide whether to stop.
Houses (in Forts): These usually don't have anything useful. Just maybe a table and a lantern you can't grab.
Houses (Along Tracks):These are worth checking! They can spawn random loot like vases, fuel sources (like wood or sometimes coal), or even valuable gold bars. Expect maybe 2-5 items per house. Watch out for 1-2 zombies usually inside. You can often hit them through the walls safely.
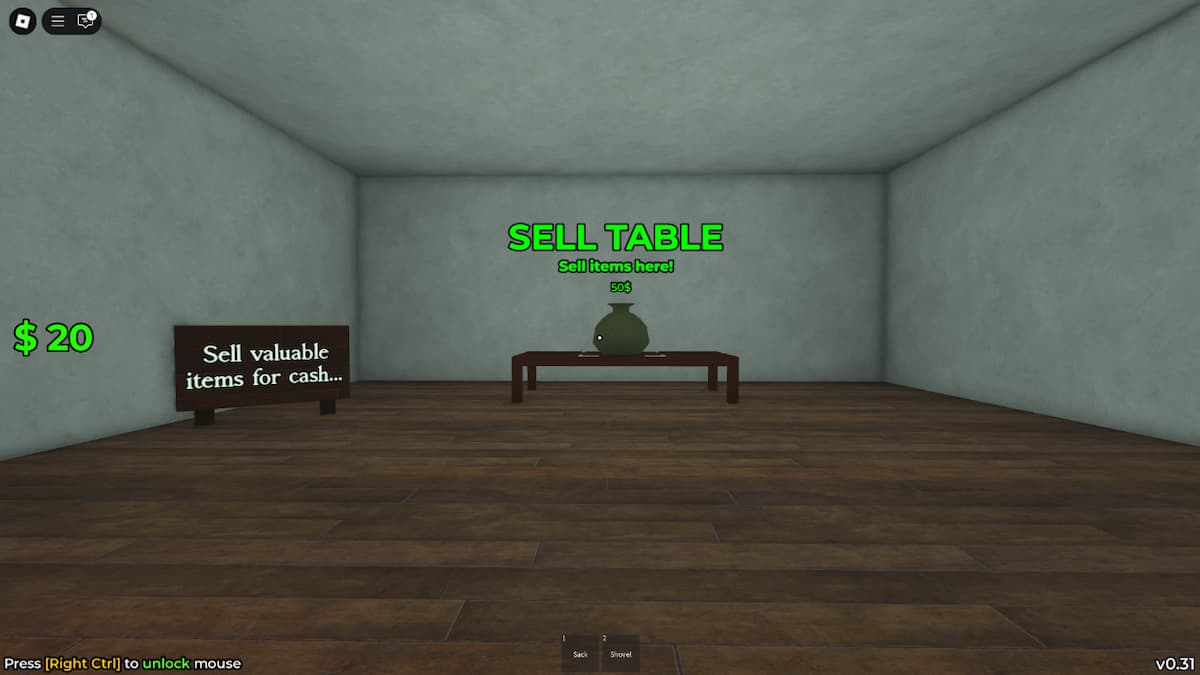
Trading Post:
Location: Reliably found inside forts, but a variant can sometimes appear along the tracks.
Function: This is where you sell your loot! Drop sellable items onto the pads on the tables. They'll turn into money bags based on their value. Hold 'E' to collect the cash. Items tagged as "valuable" are worth more. Non-valuable items usually sell for $5 max.
Track Variant: The trading posts found along the tracks also sell 2 random items taken from the General Store, Doctor, and Gunsmith shops, often bundled with their related ammo or supplies. Useful in a pinch, but unreliable.
General Store:
Location: Only found inside forts.
Function: Sells essential supplies and upgrades. It randomly stocks 4 out of 8 possible items each time you visit a fort: coal, metal plating, barbed wire, torches, dynamite, lanterns, Cameras, and saddles. Items refresh at each fort (though you might get the same items again). This is your best bet for buying lots of coal and train upgrades.
Doctor:
Location: Only found inside forts.
Function: Sells healing items: Bandages ($10) and Snake Oil ($35).
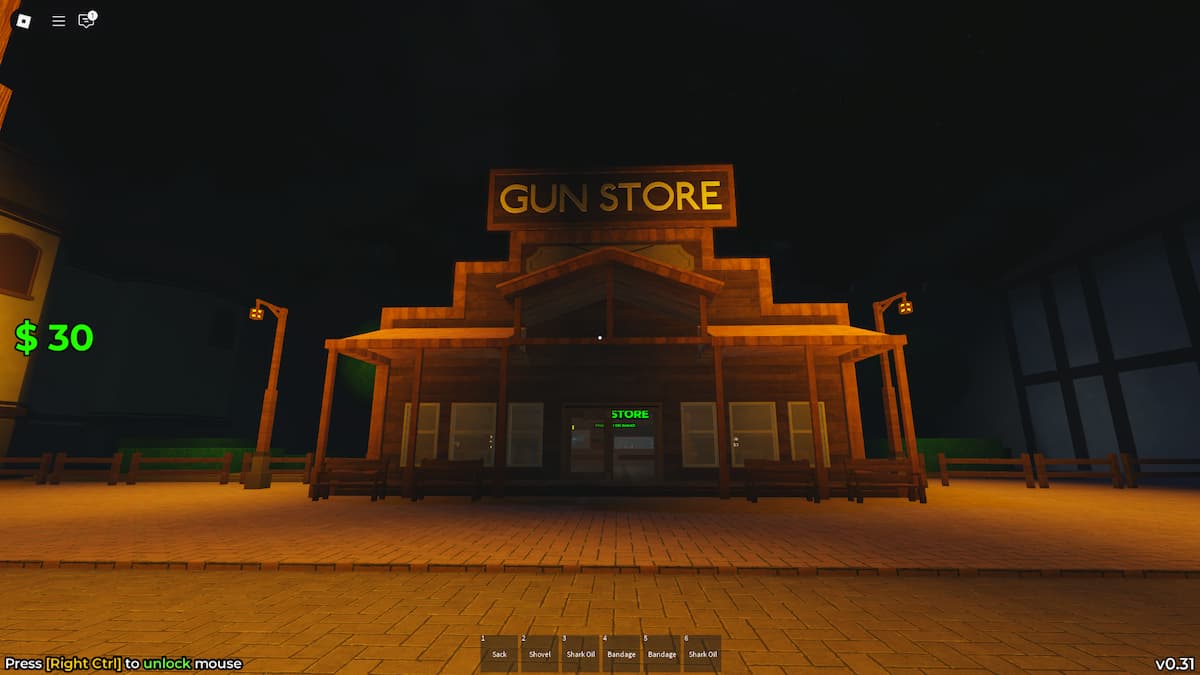
Gun Store:
Location: Only found inside forts.
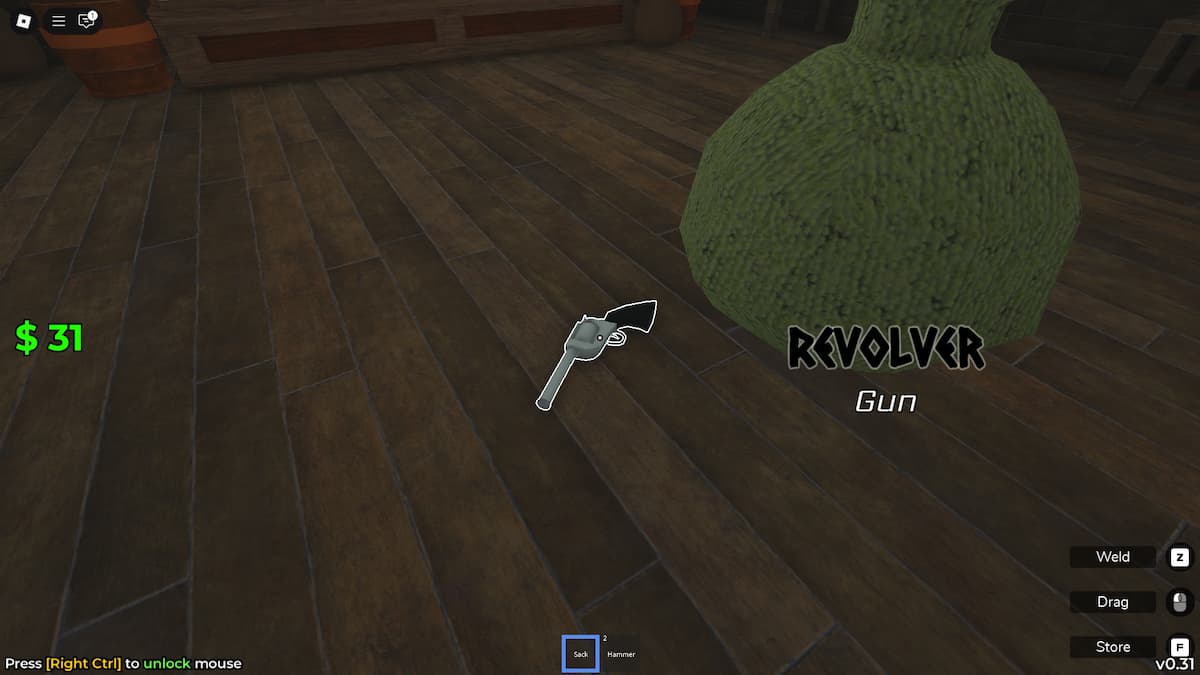
Function: Sells weapons and ammo. It always stocks the revolver, shotgun, rifle, and the Maxim Machine Gun (turret), along with their specific ammo types. This is the most reliable place to get armed, assuming you have the money. Weapons and ammo can be expensive!
Sheriff:
Location: Only found inside forts.
Function: This building is specifically for turning in bandit corpses. It works like the Trading Post, but only accepts dead bandits. Each corpse is worth $35, so clearing out a bandit group can earn you a good chunk of change. Hang onto those bodies!
Mine:
Location: A rare structure found along the tracks. Looks like a house near a mineshaft entrance (which you can't enter).
Function: The house here might have a higher chance of spawning coal, but it's not confirmed.
Barn:
Location: Another fairly rare structure along the tracks.
Function: Seems to have similar loot chances to regular houses along the tracks; not particularly special.
Fort:
Location: Appears every 10,000 meters (10km).
Function: The most important structure. Contains the General Store, Doctor, Gunsmith, Sheriff, and Trading Post. Forts offer excellent protection, especially at night. Try to time your journey so you spend nights inside forts and explore/loot during the day.
Defense: Forts have four automatic turrets, one on each corner, with 250 ammo each. They'll shoot nearby enemies automatically.
How to Heal in Dead Sails
Staying healthy is crucial. You only have two options for healing:
Bandage: Costs $10 from the Doctor. A reliable, cheap heal. Crucially, this is the only item that can revive downed teammates.
Snake Oil: Costs $35 from the Doctor. It heals more effectively than a bandage but is more expensive. Often the better choice if you can afford it and don't need to revive anyone.
Medkits: These are the best of the best of healing items, can be be found exploring Dead Sails, but if you are the Medic class, these can randomly spawn.
Understanding Classes in Dead Sails
Alright, so Dead Sails isn't just about surviving; it's also about how you survive. That's where Classes come in. Think of them as starting perks or specialties that give you different advantages (or sometimes, disadvantages!) on your journey. Choosing the right class can really change how you play the game.
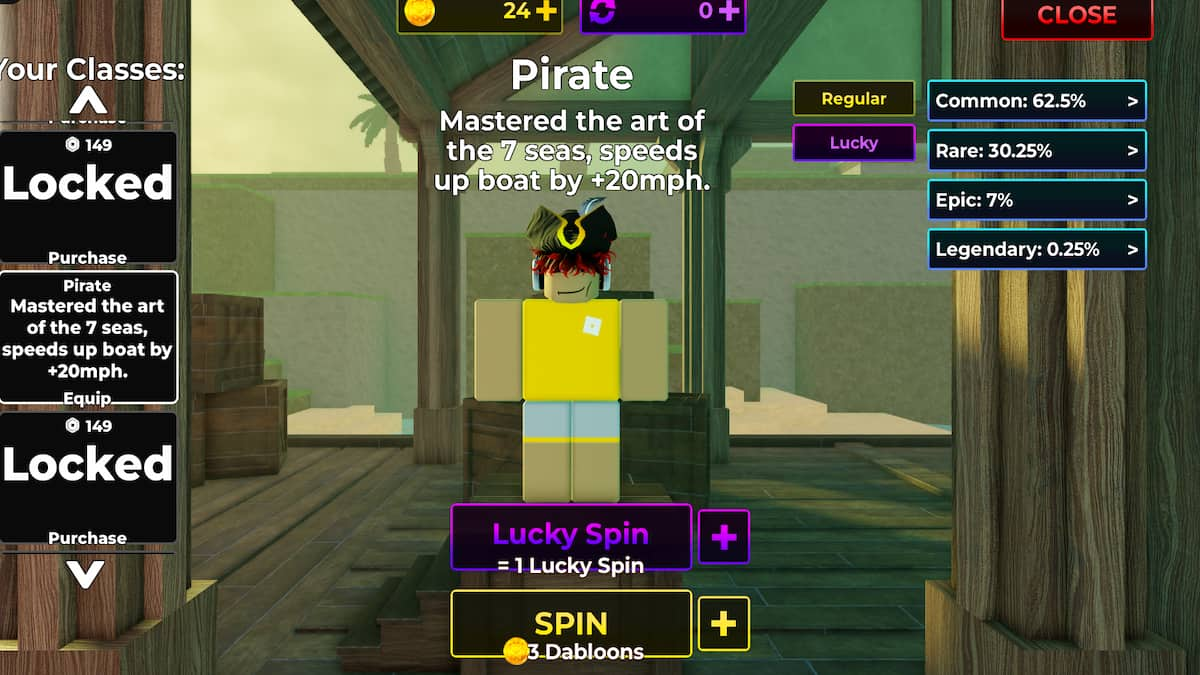
How to Get a Class in Dead Sails
You don't just pick a class; you gotta roll for it!
Find the "Buy Classes" Area: In the main lobby area before you start your run, look for the section labeled "Buy Classes".
Spend Your Currency: Interact with it. You'll have the option to spend either Dabloons or Lucky Spins to roll for a random class.
Lucky Spins cost 199 Robux per Spin!
Lucky Spins are Better: The game suggests using Lucky Spins if you have them because they have much better odds of giving you higher-tier classes (like Godly or Legendary).
Available Classes in Dead Sails
Here's a rundown of the different classes you can roll for in Dead Sails and what they do:
Pirate: Currently considered one of the weaker classes. Its only perk is increasing the speed of your sailboat by 20 MPH. Since the main mode of transport is the train, and you often need to travel slowly to spot loot, this ability doesn't offer much practical advantage in most situations.
Necromancer: This class is pretty awesome, especially if you enjoy combat. It gives you the ability to summon dead enemies to fight alongside you as allies. Think of it like having your own personal zombie bodyguards! This is super helpful against tough enemies. A great pick if you like to fight fire with fire (or, you know, zombies with zombies).
Trader: Money talks, even when zombies are trying to eat you! The Trader class increases the amount of money you get when selling items at the Trading Posts found in forts. This lets you make cash much faster, meaning you can afford more coal, better weapons, ammo, and crucial healing supplies. It really helps you gear up and survive longer stretches.
Pyromancer: This is a surprisingly handy class, especially if you're pushing for distance or find yourself low on fuel. The Pyromancer can convert any item in the game into fuel for your train's firebox. Yep, even dead teammates (a bit grim, but hey, survival's survival!). When fuel is scarce, this class can be a lifesaver.
Screwloose: Gotta go fast! The Screwloose class grants you extra movement speed while you're looting objects. This might seem small, but it lets you dash into buildings, grab loot, and get out quickly, potentially avoiding zombie encounters. Combine this speed with something like dynamite to clear rooms fast, and you become a very efficient looter.
Rich: Pretty straightforward – you start the game with more money than other classes. This initial cash injection allows you to buy essential gear like coal, a weapon, or healing items right from the very first fort, giving you a nice early advantage.
Priest: This class starts you off with a Crucifix. This special item allows you to instantly kill any single NPC enemy for free. It's incredibly useful for taking out a particularly tough zombie or werewolf quickly, especially when you're feeling overwhelmed.
Gunslinger: A great pick, especially for beginners. You begin the game with a random gun and some ammo for it. This immediately gives you some ranged protection and saves you the money you would have spent buying your first firearm at a fort.
Medic: Excellent for survivability, whether you're playing solo or with friends. Medics spawn with healing items (like bandages or snake oil) and also randomly generate more healing items over time. This constant supply helps keep you and your team healthy throughout the run.
Miner: The Miner class provides you with 4 Dynamites right at the start of your journey. Dynamite is useful for clearing groups of zombies out of buildings quickly or dealing some extra burst damage to bosses. It's a helpful starting inventory boost.
For more on Dead Sails, read Dead Sails Codes or All Items and Weapons in Dead Sails – Roblox